Popovers
- HTML/CSS Available
- Web Component In Progress (MDS-6310)
- Last Updated
2.0.0
Popovers are compact containers attached to elements that hold additional information or controls.
Variations
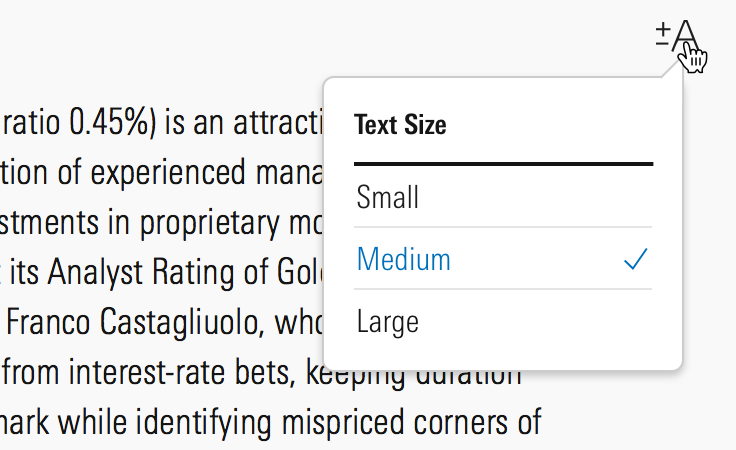
Default
Use default popovers to convey non-critical information.
<div class="mds-popover__wrapper mds-popover--overlay-closable mds-popover--overlay-dismissible">
    <button class="mds-button mds-popover__trigger mds-button--secondary" data-mds-popover="mds-popover--36191" aria-haspopup="true" aria-expanded="true"> Open Popover </button>
    <div class="mds-popover__overlay"></div>
    <section id="mds-popover--36191" class="mds-popover mds-popover--bottom-right mds-popover--width-300px" role="tooltip">
        <header class="mds-popover__header">
            <h2 class="mds-popover__title"> Popover Title </h2>
        </header>
        <div class="mds-popover__content">
            <p> Here’s a bit of content for you. </p>
        </div>
    </section>
</div>- Include a header to describe the popover’s content.
- Dismiss a popover by:
- Clicking the invoking element again.
- Pressing
escape. - Clicking outside the popover.
With Close Icon
<div class="mds-popover__wrapper mds-popover--overlay-closable mds-popover--overlay-dismissible">
    <button class="mds-button mds-popover__trigger mds-button--secondary" data-mds-popover="mds-popover--21666" aria-haspopup="true" aria-expanded="true"> Open Popover </button>
    <div class="mds-popover__overlay"></div>
    <section id="mds-popover--21666" class="mds-popover mds-popover--bottom-right mds-popover--width-500px" role="tooltip">
        <header class="mds-popover__header mds-popover__header--has-buttons">
            <div class="mds-popover__buttons">
                <button class="mds-button mds-button mds-button--small mds-popover__button mds-button--icon-only">
                    <svg class="mds-icon mds-button__icon mds-button__icon--left" aria-hidden="true">
                        <use xlink:href="/icons/mds.svg#remove--s">
                        </use>
                    </svg>
                </button>
            </div>
            <h2 class="mds-popover__title"> Popover Title </h2>
        </header>
        <div class="mds-popover__content">
            <p> This popover can be closed by clicking the “X” icon in the top right corner of the bubble. It will also close if you click outside the popover. You can select the text or click anywhere inside of the bubble and the popover will not go away. </p>
        </div>
    </section>
</div>- Include a close icon,
remove--s, in the top right of the header to afford an additional method of dismissal. - Dismiss this variation by:
- Clicking the invoking element again.
- Clicking the close icon,
remove--s. - Pressing
escape. - Clicking outside the popover.
No Header
<div class="mds-popover__wrapper mds-popover--overlay-closable mds-popover--overlay-dismissible">
    <button class="mds-button mds-popover__trigger mds-button--secondary" data-mds-popover="mds-popover--89685" aria-haspopup="true" aria-expanded="true"> Open Popover </button>
    <div class="mds-popover__overlay"></div>
    <section id="mds-popover--89685" class="mds-popover mds-popover--bottom-right mds-popover--width-300px" role="tooltip">
        <div class="mds-popover__content">
            <p> Here are three sentences of content. These sentences can offer detail and give a user additional context. If you only have 10 words to say, use a <a class="mds-link" href="/components/tooltips.html">Tooltip</a>. </p>
        </div>
    </section>
</div>- Invoke by click or hover, this is the only popover variation you can trigger on hover.
- Omit unnecessary headers.
- Dismiss this variation by:
- Clicking the invoking element again.
- Pressing
escape. - Clicking outside the popover.
Action Required
Use when a task must be completed, such as entering data and then saving or confirming.
Action Required Popover
The user can’t close this popover by clicking outside of it. The user must select one of the button options inside the popover header to close it.
<div class="mds-popover__wrapper mds-popover--dialog">
    <button class="mds-button mds-popover__trigger mds-button--secondary" data-mds-popover="mds-popover--39672" aria-haspopup="true" aria-expanded="true"> Open Popover </button>
    <div class="mds-popover__overlay"></div>
    <section id="mds-popover--39672" class="mds-popover mds-popover--bottom-right mds-popover--width-500px" role="tooltip">
        <header class="mds-popover__header mds-popover__header--has-buttons">
            <div class="mds-popover__buttons">
                <button class="mds-button mds-button--small mds-popover__button"> Cancel </button>
                <button class="mds-button mds-button--small mds-button--primary mds-popover__button"> Done </button>
            </div>
            <h2 class="mds-popover__title"> Action Required Popover </h2>
        </header>
        <div class="mds-popover__content">
            <p> The user can’t close this popover by clicking outside of it. The user must select one of the button options inside the popover header to close it. </p>
        </div>
    </section>
</div>- Use when a task requires intentional confirmation or cancellation; the popover cannot be dismissed by pressing
escapeor clicking outside the popover. - Always use a Primary Button for the confirmation action.
- Always use a Secondary Button for the cancellation action.
- Always use small-sized Buttons in the popover header.
Popover Positioning
There are 12 possible positions. Choose one that keeps the tooltip’s content in the viewport. For all positioning options see CSS Class References.
<div class="mds-popover__wrapper mds-popover--overlay-closable mds-popover--overlay-dismissible">
    <button class="mds-button mds-popover__trigger mds-button--secondary" data-mds-popover="mds-popover--73484" aria-haspopup="true" aria-expanded="false"> Center Positioning </button>
    <div class="mds-popover__overlay"></div>
    <section id="mds-popover--73484" class="mds-popover mds-popover--bottom-center mds-popover--width-200px" role="tooltip">
        <header class="mds-popover__header">
            <h2 class="mds-popover__title"> Center Positioned </h2>
        </header>
        <div class="mds-popover__content">
            <p> This popover uses the bottom center position. </p>
        </div>
    </section>
</div><div class="mds-popover__wrapper mds-popover--overlay-closable mds-popover--overlay-dismissible">
<button class="mds-button mds-popover__trigger mds-button--secondary" data-mds-popover="mds-popover--64856" aria-haspopup="true" aria-expanded="false"> Offset Positioning </button>
<div class="mds-popover__overlay"></div>
<section id="mds-popover--64856" class="mds-popover mds-popover--bottom-right mds-popover--width-200px" role="tooltip">
<header class="mds-popover__header">
<h2 class="mds-popover__title"> Offset Positioned </h2>
</header>
<div class="mds-popover__content">
<p> This popover uses the bottom right position. </p>
</div>
</section>
</div>- To use the
mds-popover--left-centerormds-popover--right-centerpositions, apply aheightand a negative 1/2 heightmargin-topto your popover in your product’s styles. For example:
.my-product__popover {
    height: 300px;
    margin-top: -150px;
}
Sizing
Popovers are available at a single size, which uses bolded $mds-font-size-s (14px) text for the title and small Buttons for header actions.
Widths
To set the width and properly position popovers you must use one of the three predefined width modifier classes: mds-popover--width-200px, mds-popover--width-300px, or mds-popover--width-500px.
<div class="mds-popover__wrapper mds-popover--overlay-closable mds-popover--overlay-dismissible">
    <button class="mds-button mds-popover__trigger mds-button--secondary" data-mds-popover="mds-popover--60437" aria-haspopup="true" aria-expanded="true"> Open Popover </button>
    <div class="mds-popover__overlay"></div>
    <section id="mds-popover--60437" class="mds-popover mds-popover--bottom-right mds-popover--width-200px" role="tooltip">
        <header class="mds-popover__header">
            <h2 class="mds-popover__title"> 200px Wide </h2>
        </header>
        <div class="mds-popover__content">
            <p> This popover is 200px wide. </p>
        </div>
    </section>
</div>- When designing for mobile responsiveness, use the
200pxor300pxwidth to ensure popover will fit on screen, or create custom popover styles within your product.
Customizing Widths
Predefined widths are a starting point. If requirements call for a different popover width, work with a designer to create custom width styles in your product’s CSS.
Product CSS
.mds-popover--top-center .my-custom-popover-width,
.mds-popover--bottom-center [.my-custom-popover-width] {
    margin-left: 200px; //Half of width, required for center positioning
    width: 400px;
}
Product Markup
<div class="mds-popover mds-popover--bottom-center [my-custom-popover-width]" role="tooltip"> ... </div>- Use custom widths sparingly.
- Always follow typographic line length guidelines.
Guidelines
Use When
- Displaying supplementary content or actions, without obscuring the page.
Don't Use When
- Creating a menu of options. Instead, see Menus.
- When content is 10 words or fewer. Instead, use a Tooltip.
- Requiring a user to complete a complex task. Instead, use a Modal.
Visual Language
- Center the popover’s tail on its associated object, even if the popover’s balloon is offset.
- When placing text in the
mds-popover__contentelement, define typography as custom styles within your product.mds-popover__contentdoes not include any default font styling. - Consider applying a custom
z-indexvalue when you compose this component with other layered components, e.g., Dialogs, Modals, Tooltips or Notifications to meet your product requirements.
Trigger Pairings
- Icon
Invoke a popover with an icon-only Button, omitting the down caret icon,caret-down--s.
 Invoke a popover with an Icon-Only Button.
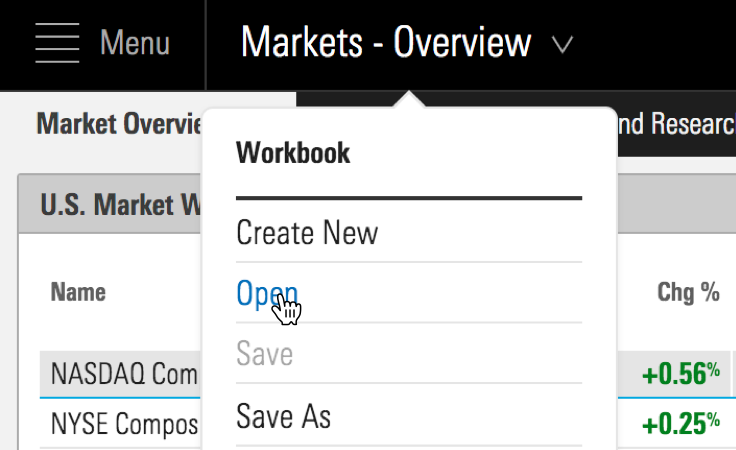
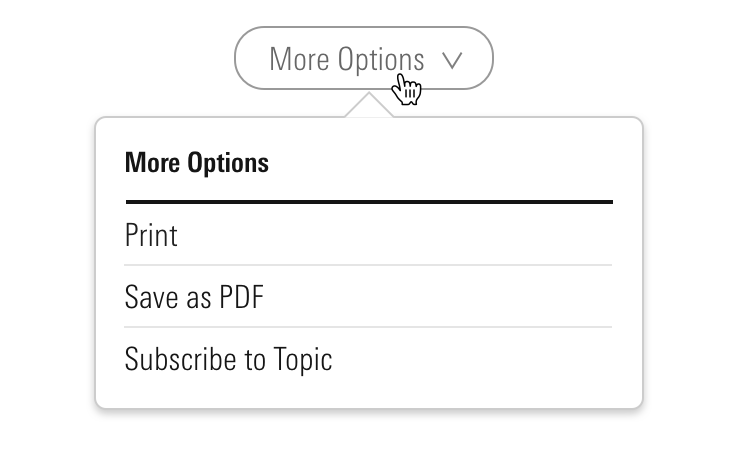
- Button
Invoke a popover with a Button only when a down caret icon,caret-down--s, is included to the right of the label.
 Invoke a popover with a Flat Button.
 Invoke a popover with a Secondary Button.
Editorial
Popovers offer the opportunity to contextualize a choice, define a concept, and set expectations about what might lie beyond the clicking of a call to action nearby.
- Use plain language; don’t use acronyms.
- Keep it to no more than three short sentences. Anything longer should be relayed in a Modal, conjured by a link.
- For titles, use title case and capitalize prepositions of four or more letters.
Accessibility
- When creating the
mds-popover__titleof a popover, teams should use the header tag (<h#>) which properly places the content within their product's information hierarchy. - Always use
role=”tooltip”on the.mds-popoverelement. For accessibility purposes the intent of the element is the same as a tooltip.
Additionally, update the Button component that triggers the popover to change its behavior:
- Add
aria-haspopup=”true”to the trigger button. - Add
aria-expanded=”false”to the trigger button and dynamically update the value totruewhen popover is open. - Add
aria-controls=”[Popover ID]”to the trigger button.
Code Reference
CSS Class References
|
Class
|
Applies to
|
Outcome
|
|---|---|---|
|
|
|
Initializes a |
|
|
Any block, or inline-block element, most likely a |
Always apply to the immediate parent of the popover’s trigger element, wrapping the trigger and the popover itself. |
|
|
|
Toggles visibility of a popover. |
|
|
Any inline, block, or inline-block element |
Enables showing the popover on press of |
|
|
|
The hook set on an anchor inside of a |
|
|
|
Aligns popover to the top center of the invoking element. |
|
|
|
Aligns popover to the top right of the invoking element. |
|
|
|
Aligns popover to the top left of the invoking element. |
|
|
|
Aligns popover to the bottom center of the invoking element. |
|
|
|
Aligns popover to the bottom right of the invoking element. |
|
|
|
Aligns popover to the bottom left of the invoking element. |
|
|
|
Aligns popover to the right center of the invoking element. |
|
|
|
Aligns popover to the right top of the invoking element. |
|
|
|
Aligns popover to the right bottom of the invoking element. |
|
|
|
Aligns popover to the left center of the invoking element. |
|
|
|
Aligns popover to the left top of the invoking element. |
|
|
|
Aligns popover to the left bottom of the invoking element. |
|
|
|
Renders a 200px wide popover. |
|
|
|
Renders a 300px wide popover. |
|
|
|
Renders a 500px wide popover. |
JavaScript Considerations
Engineers should use their own JavaScript libraries and implementations that most appropriately fit within the requirements for their applications and environments.
- Do not use
mds-popover--overlay-closableas this is deprecated and will be removed in 2.0. - Use
mds-popover--overlay-dismissibleto indicate that the popover is dismissible. This class is only included to account for demo JavaScript that does not ship with the component, you can utilize it as a hook in your JavaScript or omit it completely, but it is deprecated and will be removed in 2.0.