Design Handoff to Development
Designers and developers should refer to system elements by the same names. This guide shows you how to call out MDS vs. custom components within visual designs.
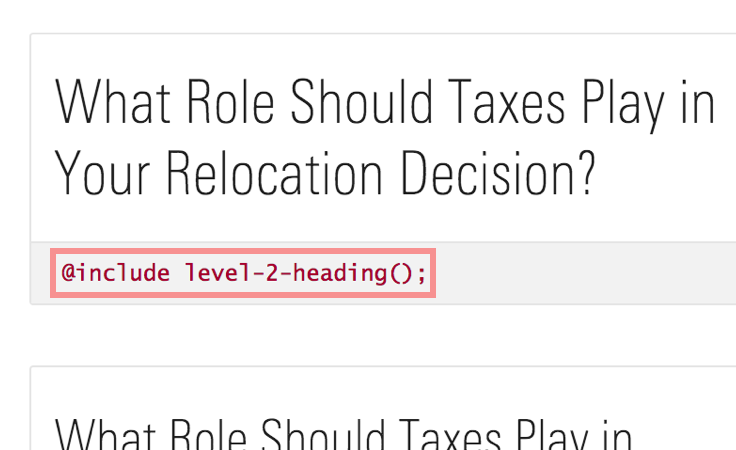
- Whenever possible, specify typography by referencing the text style mixins on the Typography page. Mixins apply many different styles to text, including color, font weight, font size, and line height.
 Mixin name on the Typography page.
- Override text styles (both body text and headings) as bolded by adding the text weight constant to your annotation, i.e.,
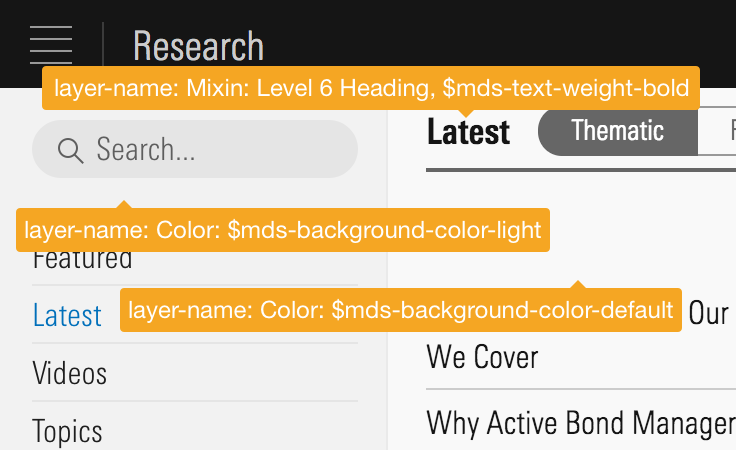
Mixin: level-3-heading, $mds-text-weight-bold.
 Apply bolding to any typography mixin.
- To meet accessibility color contrast requirements, use only MDS text colors and their constants, i.e.,
$mds-text-color-error-on-light.
UI Components
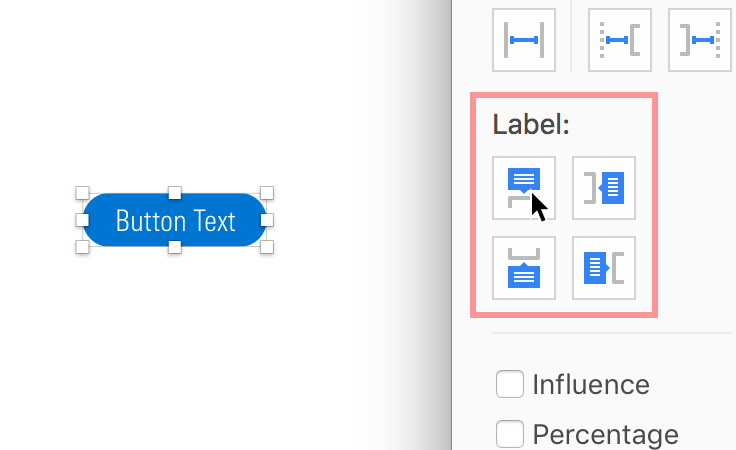
- Always specify UI Components by name and, when applicable, size and variation, i.e., MDS Button Medium Primary, MDS List Group Small.
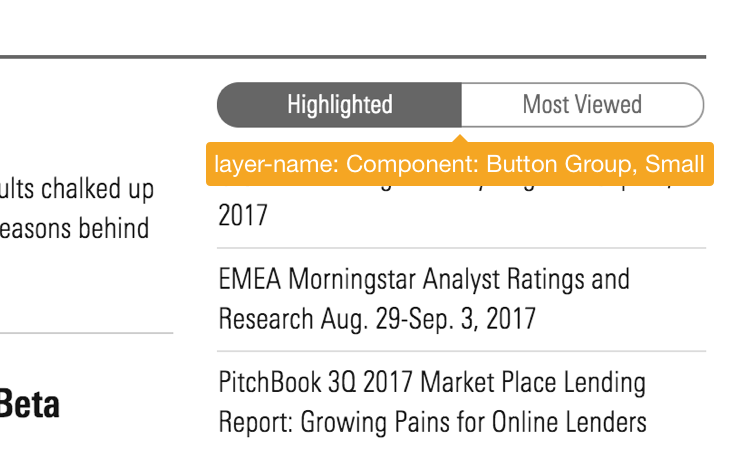 Annotating components.
- Optionally, consider including links to relevant component documentation pages. Links within PDFs are automatically clickable.
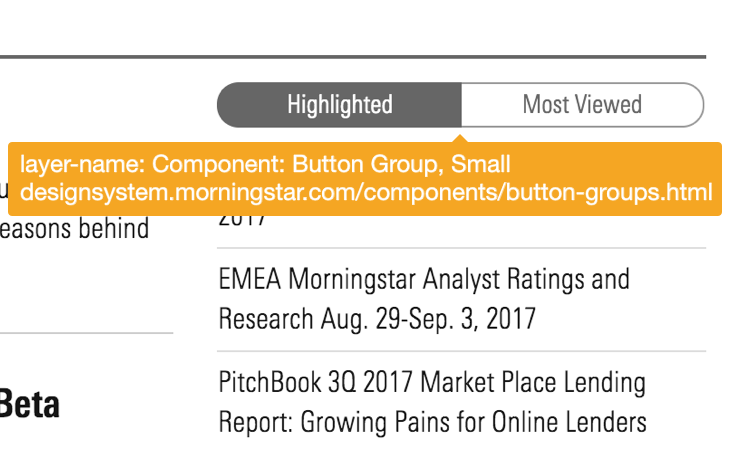 Include a link in your annotations for quick access to component pages.
Color
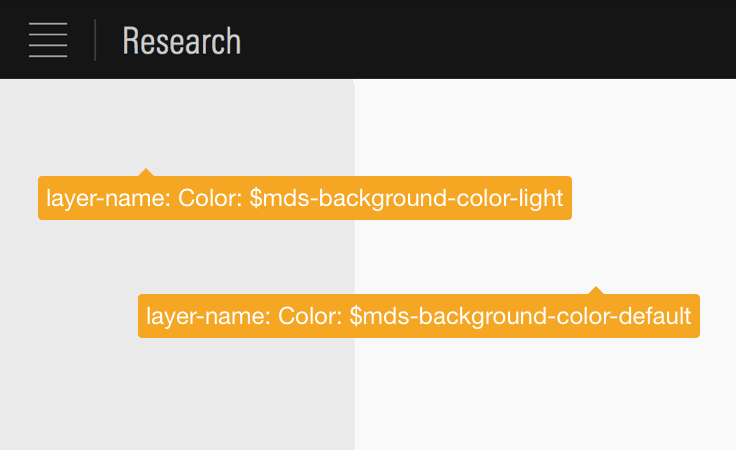
- Always specify colors using Color constants.
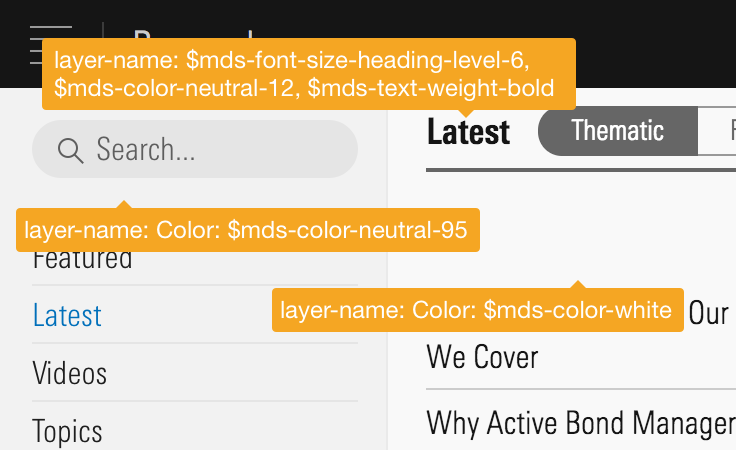
- Avoid annotating colors using base color constants such as
$mds-color-neutral-##.
 Annotating colors using mds_constants.
- Specify UI Components and Typography mixins by the same name on all backgrounds.
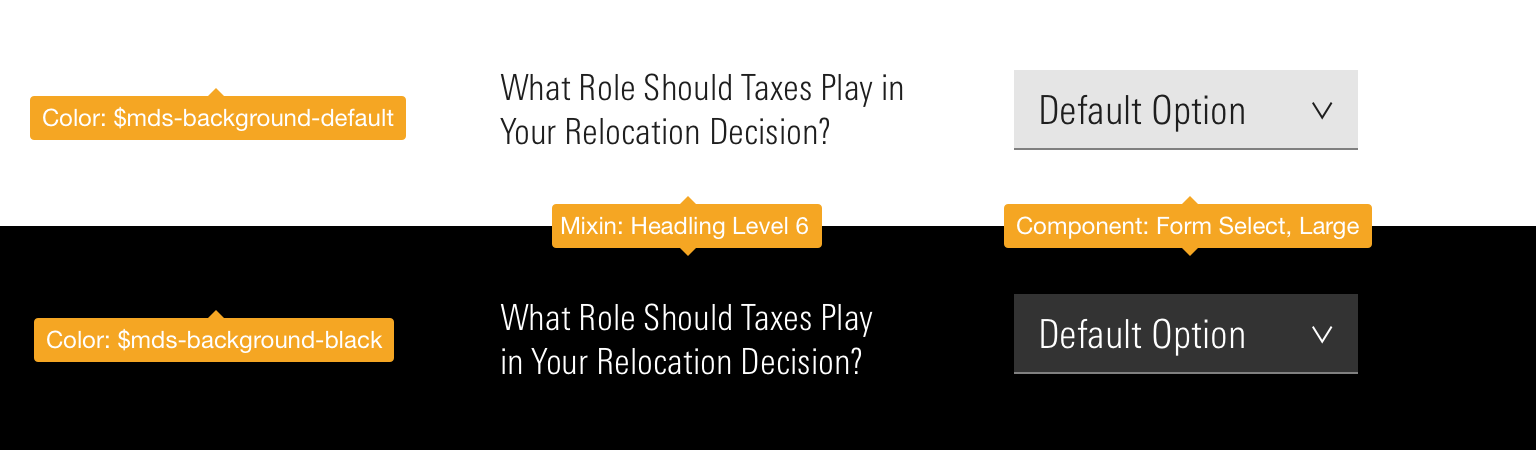 Typography mixins and components are built for both light and dark backgrounds.
Iconography
- Always specify icons using their name on the Iconography page, i.e.,
bookmark-fill,alert-fill--s. - Static icons can be specified by using icon name only.
- When icons are interactive, always use the Icon-Only Button.
- When using multiple icon buttons in a row, alway use the Icon-Only Button Group.
Space
- Use the constants on the Space page to annotate space between elements.
- The most common spaces used will be
stack, for adding space to the bottom of an element, andinline, for adding space to the left or right of an element.- Use inline-left spacing to separate inline elements flowing together from the left edge. This applies right margin to each item. The opposite is true for inline-right.
- Currently the MDS spatial model is tailored to the space within components, so the increments are small and not always sufficient for composing a page layout. When spacing out elements more than
16px, specify the space in increments of8px, i.e.,24,32,40, etc.
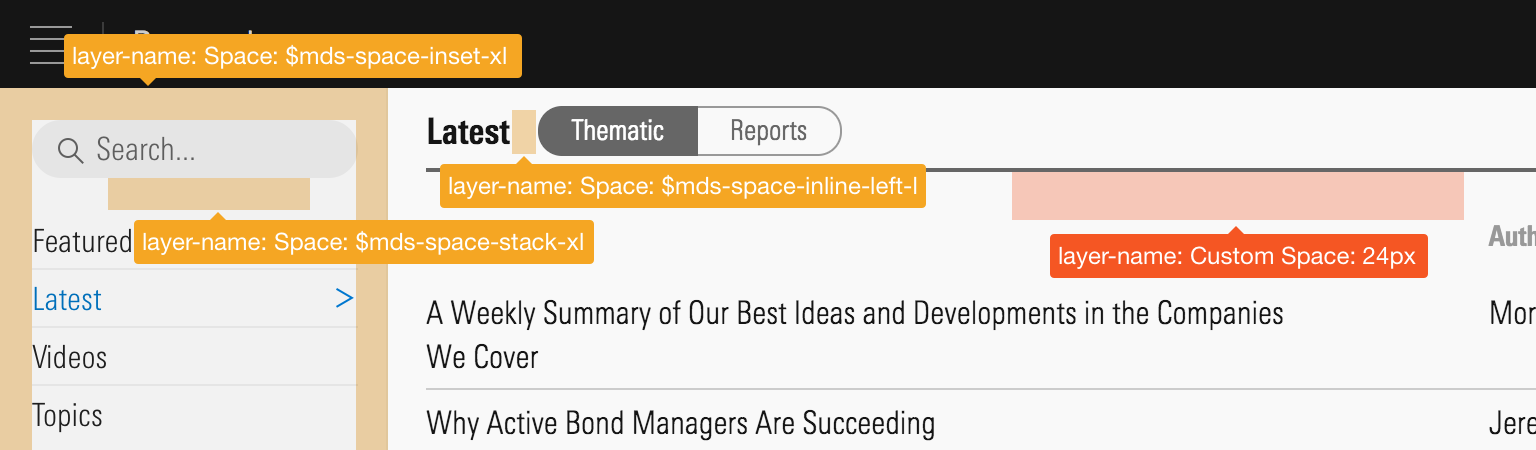 A combination of MDS Space constants and custom space.
Borders
- Specify borders with Border constants.
 Annotating a Border separator.
Custom Designs
- Always attempt to use the methods above to specify as much of the design as possible.
- If your design extends beyond what MDS offers, use the base Constants to specify as many details as possible.
- Label custom design details in annotations, and consider using a different color to signal custom work, as this may help developers better size styling efforts.
Additional Resources
Sketch Measure Plugin
The Sketch Measure plugin automatically generates the yellow-background annotations in the above examples. By labelling layers with design details, this feature allows you to quickly generate annotated specifications.
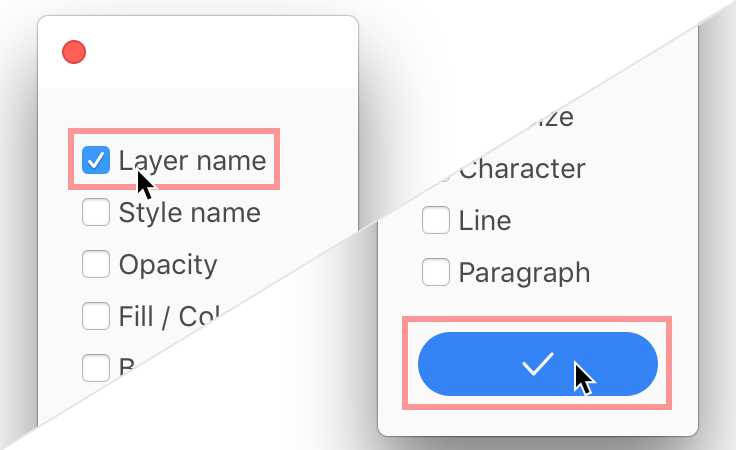
1. Download and install the Sketch Measure plugin.
2. Open the Sketch Measure Toolbar 2.0

3. Select the object to annotate, and choose the positioning of the annotation.
4. Choose only “Layer name” and click the blue checkmark button to create the annotation.
InVision Inspect
Using the InVision Inspect tool allows an engineer to view all of the details of an uploaded .sketch file. Identify MDS components and constants by naming the layers in your Sketch file with MDS component and constant names.
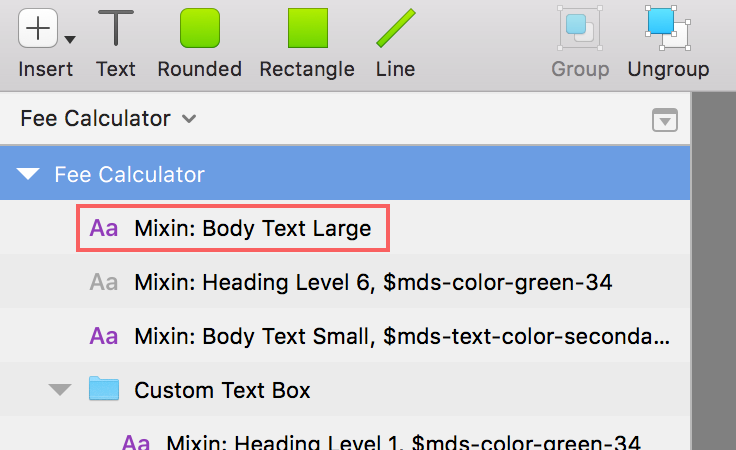 Annotations as layer names in Sketch.
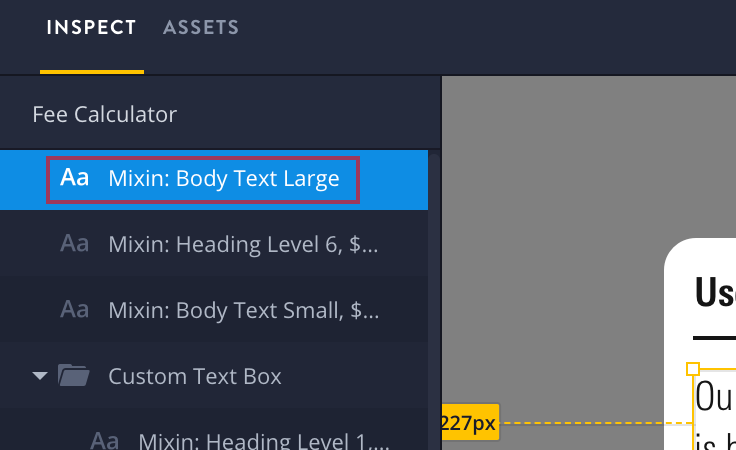 Annotations as layer names in InVision Inspect.