Building a Component
Building a Component
MDS components are available in two formats, as pure HTML/CSS and as vanilla JavaScript web components. Follow the relevant guide below when building a new component.
Overview
MDS components are always built initially as pure CSS and HTML, using Nunjucks to create the HTML template and SCSS to integrate meaningful Constants in to the component’s styles. Before we begin writing code, new components go through a rigorous [Discovery] and [Design] phase, which you can read about in detail on our development overview page.
Before You Begin
If you have not yet contributed to the mds repository:
- Request write access to the
mdsrepository from the MDS core team. - Follow the README for the
/librarydirectory in themdsrepo to get set up. - Spend some time familiarizing yourself with the coding standards, development process, and AVR testing framework.
Build Process
1. Initial Setup
From the /develop branch in the mds repo, create a feature branch following the naming convention of:
feature/[JIRA-issueNumber]--[component-name]-build
For example if you were tasked with “MDS-9854 Button Build” your branch name would be:
feature/MDS-9854--button-build
See the running local environment page for guidelines and all available commands.
Generate Starter Files
From /library within your local copy of the mds repo, run gulp generate:new-component.
When prompted, enter the name of the component you’re creating. Enter a lowercase, singular, space separated name like “data table”, not “DataTable” or “Data-tables”, and answer "no" when asked if a JavaScript file should be generated.
The gulp task will generate the following three files for you. For example, if you entered “data table”:
- Nunjucks template:
/library/components/data_table/data_table.njk - SCSS file:
/library/components/data_table/data_table.scss - Automated visual regression (AVR) test page:
/library/test/visual/test-pages/components/data-tables.njk
2. Component Build
Use the generated Nunjucks template file to define the macro that will compile the HTML for your component. Consult the design spec to define props for your macro, and consider the examples that will be surfaced on the documentation site. Nunjucks macros are for internal MDS use-only, don’t overengineer them, instead, make them just configurable enough to cover our design and accessibility requirements.
Follow all HTML and CSS coding standards when creating your component.
AVR Test Page Creation
Test pages are intended to exercise all available states and variations of components. As you write your component, add each variation and all its states as dedicated rows on the test page and label the examples for identification. See the AVR Testing page for detailed instructions on creating test pages and running AVR tests.
3. Code Review & PR Process
When your build is ready for review, open a PR and assign review tasks to the designer who worked on the component and, at minimum, one other MDS core team engineer.
Before Submitting a PR
In order to keep the PR process efficient make sure you’ve checked the following before submitting your PR:
- Your feature branch has been recently reintegrated with develop and can be cleanly merged into develop once all approvals have been met.
- All AVR tests are passing, not just tests written for your component, and you have promoted baseline images for your new component.
- You’ve tested the rendering of your component across all required browsers.
- There are no Sass Lint warnings or errors being thrown in the console.
- Any commented out code is deleted.
Create the PR and Subtasks
The MDS core team follows a rigorous pull request and peer review process. A minimum of two reviewers is required for PR approval within the mds repo. At least one core team engineer and one core team designer will review your build.
Create the pull request in BitBucket to merge your feature branch into develop. Then, create “PR Review” subtasks on the original JIRA issue you were assigned. Assign one subtask to each reviewer and include a link to the pull request in the subtask description.
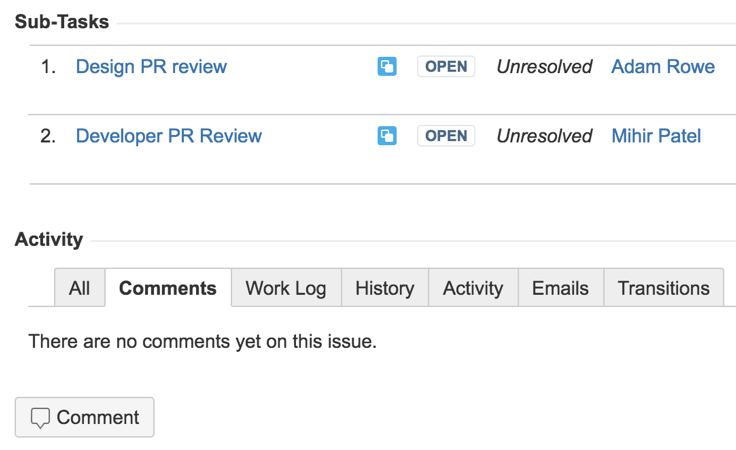 PR review sub-tasks in JIRA.
Overview
MDS Web Components are JavaScript implementations of MDS components. These components align with both the W3C Web Components specification and the Morningstar Web Components specification.
Practically, MDS Web Components are a single JavaScript file containing an HTML template and an API definition for the component. The template and API are composed as an ES6 class which extends the base HTMLElement, defining a new custom element that can be used alongside the core HTML elements of <div>, <h1>, <a>, etc.
Before You Begin
If you have not yet contributed to the mds repository:
- Request write access to the
mdsrepository from the MDS core team - Follow the README for the
/librarydirectory in themdsrepo to get set up.
Build Process
The MDS Web Component build process is comprised of five steps:
- Initial setup
- API definition & approval
- Test-driven development component build
- Template translation or creation
- Code review & PR process
1. Initial Setup
From the develop branch in the mds repo, create a feature branch following the naming convention of:
feature/[JIRA-issueNumber]--[component-name]-build
For example if you were tasked with “MDS-9854 Button MDSWC Build” your branch name would be:
feature/MDS-9854--button-build
Generate Starter Files
- From
/librarywithin your local copy of themdsrepo, rungulp generate:new-mdswc-component. - When prompted, enter the name of the component you’re creating. Enter a lowercase, singular, space separated name like “data table”, not “DataTable” or “Data-tables”.
The gulp task will generate the following three files for you. For example, if you entered “button”:
- Class/template definition:
/library/components/button/button.js - Automated visual regression (AVR) test page:
/library/test/visual/components/buttons-mdswc.njk - Unit testing suite:
/library/test/unit/components/button.test.js
Check AVR Test Page
Run npm start from /library within your local checkout of the mds repo. Navigate to localhost:3000/visual/[plural-component-name]-mdswc.html after the local environment starts up and ensure the “Hello World” <h1> from the heartbeat template is rendering correctly.
Press ctrl + c in the console to stop the local server.
Run Unit Testing Environment
Run npm test from /library within your local checkout of the mds repo.
This will start the test runner which will remain running and watching for changes to both the unit test file and the component source file. Each time you save a file the tests will be executed again.
You should see your new component’s first test passing within the console. It may show as “3 or 4 tests passing”. This is because Karma attempts to run the tests in all installed browsers on your local machine.
To ensure the monitoring is working correctly, go to the unit test file (/library/test/unit/components/[component-name].test.js) and change the class key in componentDefaultProps to klass.
Save the file and watch the console. You should see a failing test message that looks similar to the image on the right.
Change klass back to class and save the file again. Make sure the test passes and then press ctrl + c in the console to stop the test runner.

Commit these three starter files to your branch.
2. API Definition & Approval
The next step is to document the component’s API and have it approved by the MDS core team. Make a copy of this O365 template to use as a starting point to define all props, slots, methods, and events that comprise the component’s API.
Many MDS components have an existing nunjucks macro that can serve as an early reference for prop and slot definition. Look for a [your_component_name].njk in the components directory of the mds repo.
Props
Every MDS Web Component will contain a set of properties. These properties allow consumers of the component to configure the component’s appearance, accessibility attributes, and interactivity.
Read the props section of the MDS Web Component coding guidelines for implementation details, including guidelines on prop naming, casing, and validation.
- Include meaningful default props for every MDS Web Component.
- Ensure that all applicable accessibility attributes can be controlled and configured via props. If the component you’re building has an existing nunjucks macro, be sure to include the same accessibility attributes already present in the macro’s argument list and template.
All components must support the following props:
class- Receives a space-separated list of CSS classes to be added to themds-component-nameblock element within the custom element’s template.id- Sets theidattribute of the blockmds-component-nameelement within the custom element’s template.
The attribute mwc-id is already built-in to the base class and does not need to be explicitly defined.
Slots
Some components will need to define sections within the component template where consumers can inject their own markup or additional components. In these cases the component will define slots within its template where this content can be injected. Refer to the slots section of the MDS Web Component coding guidelines for guidelines on slot naming and other implementation details.
Methods
Components that offer additional interactivity will require methods to alter the state of the component. For example, a modal component will need an open() and close() method. Refer to the methods section of the MDS Web Component coding guidelines for guidelines on method naming and other implementation details.
Events
When components need to communicate internal behavior to other parts of the parent application, they must do so using events. Refer to the events section of the MDS Web Component coding guidelines for guidelines on event naming and other implementation details.
API Approval
Core Team Review
Once a component’s Props, Slots, Methods and Events are documented, the API must be submitted for approval by members of the MDS Core team. During this process the core team will check the API for adherence to the MDSWC Coding Guidelines and also normalize any shared prop, slot, method, or event names with other similar concepts in previously built components. Expect at least one round of revisions to the API as part of this process.
Community Review
Add a link to the API documentation in the Microsoft Teams MDS Engineering channel with a request for feedback. Community members will have 48 hours to review the doc and leave comments in O365. If deeper conversations or concerns are raised, these can be handled via Teams and coordinated with the engineering group. An example Teams message is provided for you to copy and paste:
MDSWC Update: Button component API documentation is ready for review. Community members have 48 hours from now to review the following document and leave comments in O365. [link/to/O365-document]
3. TDD Component Build
All MDS Web Components will be built using the test driven development (TDD) approach. Refer to the unit testing page for details on how to organize code within unit tests, how to group individual tests into suites, and the proper syntax for test labels to ensure consistency across MDS. The unit testing page also contains a link to a sample testing template you can use to get started.
4. Template Translation
MDS Web Components that have an existing nunjucks-based macro will go through a translation process to replicate the nunjucks macro in a JavaScript/HTML template.
When building the Web Component version of an existing HTML/CSS component, you may have to add additional styles to the component’s SCSS file to account for the custom element and <slot> nodes in the DOM.
Use a comment to note any MDSWC-specific styles you add, for example:
// MDSWC Changes
mds-alert {
    .mds-alert__cell-icon {
        svg {
            display: block;
        }
    }
}
Test Page Creation
Components that already have a nunjucks macro also have an AVR test page that exercises the macro by creating examples that demonstrate the numerous configurations possible by combining various component properties.
When translating an existing nunjucks macro into a JavaScript/HTML template, use the existing test page as a guide for building the new MDS Web Component test page. Use the MDS Web Component custom element in place of the nunjucks macro to recreate, example-by-example, the nunjucks macro version of the page.
Include examples where the component is called without any props so the default component rendering can be tested.
Once the MDS Web Components test page is created, run the AVR tests to add baseline images for the new page so visual changes can be detected in the future. Refer to the AVR testing page for details on how to run the tests and add new baseline images.
5. Code Review & PR Process
Critique
The MDS Core team has bi-weekly critiques where work-in-progress is presented and reviewed. Once the component’s test page is built and unit tests are completed, bring the component for review to one of these MDS Core Team critiques. Reach out via the Microsoft Teams MDS Engineering channel to be added to the schedule and invite list for one of these critiques. Be prepared to demonstrate:
- The component’s default behavior (no props)
- Content resilience examples
- Accessibility compliance
- Design System compliance
- Unit test coverage
Before Submitting a PR
In order to keep the PR process efficient make sure you’ve checked the following before submitting your PR:
- Your feature branch has been recently reintegrated with
developand can be cleanly merged intodeveloponce all approvals have been met - All unit tests are passing, not just tests written for your component
- All AVR tests are passing, not just tests written for your component
- You’ve tested the rendering and functionality of your component across all required browsers
- There are no ESLint or Sass Lint warnings or errors being thrown in the console
- You’ve removed all
console.logstatements - Any commented out code is deleted
Create the PR and Subtasks
The MDS Core team follows a rigorous pull request and peer review process. A minimum of two reviewers is required for PR approval within the mds repo. At least one core team engineer and one core team designer will review your MDS Web Component during the PR process.
Create the pull request in BitBucket to merge your feature branch into develop. Assign at least one MDS core team engineer and the assigned team designer to the pull request. If you’re unsure who should be assigned, reach out in the Microsoft Teams MDS Engineering channel for help.
If applicable, also create “Review and Approve” subtasks on the original JIRA issue you were assigned. Assign one subtask to each reviewer and include a link to the pull request in the subtask description.
Core Team Member Approval
MDS Core team members will do the following during the peer review process:
- Perform a line-by-line code review of your ES6 Class, unit tests, and test page
- Visually inspect your test page across all supported browsers by running your branch locally
- Ensure the component meets all MDS design requirements
- Run your unit tests locally to ensure they’re all passing
During this process core team members will leave comments and specific tasks for you to complete as you refine the component to get it ready for merging into the develop branch. Expect several rounds of refactoring and revision at this stage.
Once approved, notify the core team via the Microsoft Teams MDS Engineering channel that all tasks and comments on the PR have been addressed and that it’s ready to be merged. A member of the core team will then merge the pull request.
Post-Build Requirements
MDS Showcase
Upon completion of a component build task, collaborators will be asked to present their work at the next MDS Showcase. These meetings take place every two weeks and communicate progress and new features to MDS stakeholders. Be prepared to do a high-level overview of the component you’ve built by demonstrating the visual test page and all the variations that have been assembled there.
MDSWC Working Group
You will also be asked to give a more detailed demonstration at the MDS Web Components working group meetings that take place every two weeks. Be prepared to answer questions and show code examples of the component in action.
Documentation Consulting
You may be consulted during the documentation phase of the component for technical questions or code example reviews.